This post is to supplement the video post that compares methods, models and software for the upscaling of images and photos. I was upscaling from time to time in certain ways and I wanted to have a better idea if I was doing something wrong. I did want to try AUTOMATIC 1111 and several upscalers like the Ultra Sharp x4, SwinIR and Real ESRGAN but that did not go as planned. I did the upscales and got the images, but after I updated AUTOMATIC 1111 to 1.7 version and repeated the upscales I was getting consistently worse outputs.
So I decided to switch to ComfyUI which is a better solution, but more complicated one. That drawback though, gave me the opportunity to search, implement and try a workflow in ComfyUI, that is based on a video from Scott Detweiler which gave me better results than the one from AUTOMATIC 1111. Since I cannot tell if I have a bug, or another problem in my AUTOMATIC 1111 setup, I will not present these images, but only the ones from the ComfyUI.
This workflow from Scott Detweiler was altered by adding the Face restoration ability as well and you can download it and test from the link below:
The rest of the upscales was done with face restoration when needed and I used Photoshop’s Super Zoom and Topaz AI Image.
I also used methods like upscaling with the Nearest Neighbor, Preserve Details from Photoshop and Super Resolution from Lightroom but they do not give comparable results and I left just a couple of examples to showcase the results.
https://www.adobe.com/creativecloud/photography/discover/increase-resolution.html
Below you can find a way to easily compare the outcomes of the upscales by placing side by side images to compare
Face restorations
Face restorations is a process within the image generation / restoration. It generally takes into account the face characteristics that are detected and generates the facial details with the use of functions and models that are separate from the image to image pipeline and superimposing the results. The weight of the face restoration can usually be controlled and have less or more impact on the final result.
For the comparisons the Face restorations were done with the respective software methods, for Photoshop and Topaz AI Image there are sliders that activate it and also the user can control the power of the effect to the generated image. For the rest of the upscalings that were done from the AUTOMATIC 1111 a combination of GFPGAN and Codeformer was used for the 300 pixels to 1200 pixels upscales because I tested and saw that I liked the results better.
For the 1000 to 4000 pixels, the faces were clear enough and the Face restoration was just making the upscaled photo worse. You can always lower the power of it and it will just sharpen some of the details. However, this is something that can be easily accomplished with other methods and the user can have more control on it.
Below you can find a way to easily compare the outcomes of the upscales by placing side by side images to compare.
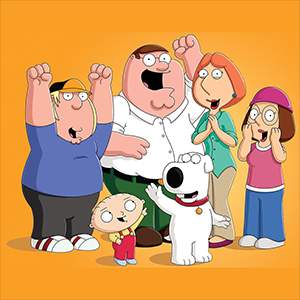
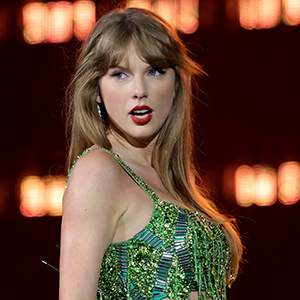
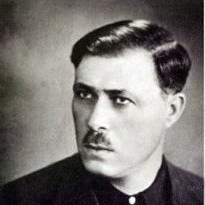
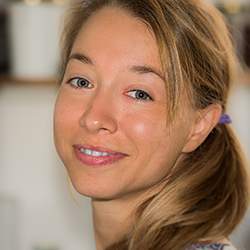
300 pixels to 1200 pixels
Legend
Green options changes the left photo,
Blue options changes the right photo
If f at the end then Face Restoration was used, eg re = R-ESRGAN 4x without face restoration, ref = R-ESRGAN 4x with face restoration.
n: Normal (1200pixels image), nn: Nearest Neighbor, pd: Photoshop Preserve Details, sz: Photoshop: SuperZoom, us: Ultra Sharp, ldsr: LDSR, topaz: Topaz AI Image, ps: Photoshop Preserve Details 2.0, an: R-ESRGAN 4x-Anim6B, re: R-ESRGAN 4x, sw: SwinIR 4x